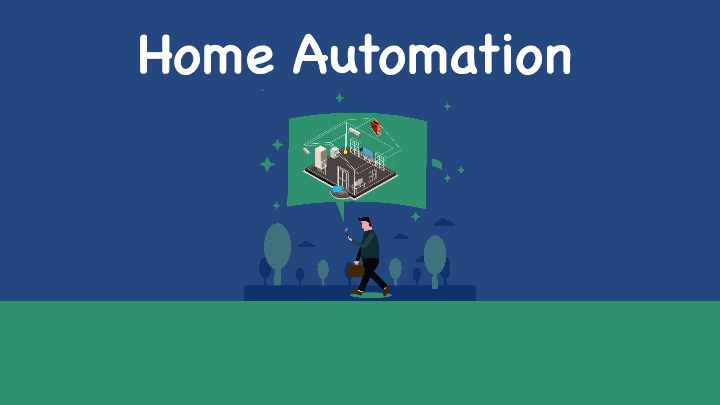
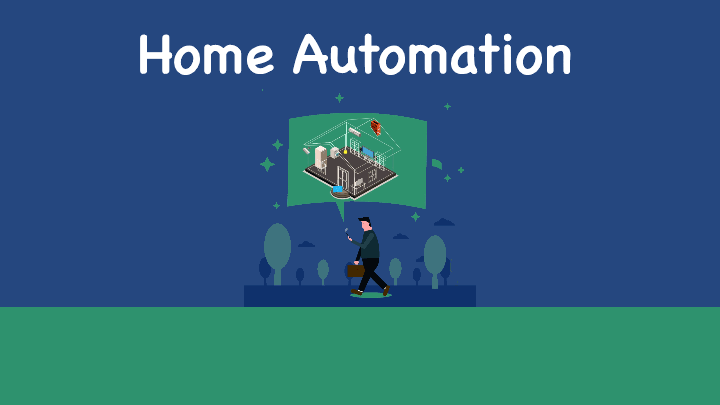
Blog #40 - Home Automation

As promised here is the first instalment of my series on Home Automation.

Home automation has become an integral part of modern living, offering convenience, efficiency, and enhanced security. In this video we explore the various aspects of home automation, including individual smart devices, comprehensive systems, and the benefits they provide. By breaking down the concepts of automation and remote control, we aim to clarify how these technologies can simplify your daily life and enhance your home experience.

Home automation can be categorized into two main components:  automation and remote control. For instance, consider the Nest thermostat, a widely recognized smart device. It exemplifies both functions effectively. The Nest is automatic due to its built-in motion sensor, which detects whether you are home and adjusts the temperature accordingly. Additionally, it learns your heating and cooling habits over time, optimizing your comfort.

On the other hand, the Nest thermostat is also remote-controlled. You can manage it from a mobile app, allowing you to adjust settings from anywhere in the world. This app serves as a hub for your Nest device, but the concept of a hub extends beyond just one device.

The right hub can integrate a multitude of devices from various brands, creating a cohesive smart home ecosystem.  Some smart technologies, like Amazon Alexa or Google Home, come with built-in hubs. For example, I use my Google Home as a hub for my Lumeeman smart light bulb, enabling me to control the lights with simple voice commands. It’s akin to living in a futuristic spaceship!

Home security systems also exemplify the hub-tech combination. AT&T’s full system allows you to integrate all your smart devices—lights, locks, and more—into a single control panel. This integration provides peace of mind, as you can receive alerts and monitor your home from your phone, eliminating the need to ask a friend or family member to house-sit.

Imagine this scenario: you’re about to embark on a vacation to an exotic destination, but you’re overwhelmed with packing. Upon arriving at the airport, you realize you’ve forgotten to turn off the lights, adjust the thermostat, or close the garage door. If you have home automation set up, you can simply access your hub’s app and manage everything from your phone. Plus, you can schedule your heating to turn back on shortly before your return, ensuring your home is warm and welcoming.

The value of home automation ultimately depends on your personal needs and lifestyle. While a smart coffee maker that brews at 7 a.m. may sound appealing, it might not be a necessity for everyone. However, if you’ve ever stubbed your toe in the dark, investing in a smart light bulb could be a worthwhile decision.

For those looking to dip their toes into home automation, starting with a SmartThings starter kit, priced just over a hundred dollars, can be a great option. This kit typically includes a hub and a few devices to kickstart your smart home journey. Alternatively, you can begin with a smart speaker and gradually add devices like smart light bulbs, which can range from $20 to several hundred dollars depending on your preferences.

Home automation is designed to be accessible and adaptable to various lifestyles. Most popular brands prioritize user-friendliness, ensuring that there’s likely a product available to enhance your convenience. For further insights on home automation, you can…visit this website…https://bit.ly/4eM25ZS...and browse the various products that are available and pick and choose from their abundant sources of home automation kits and products.

Blog #39 - Calculating Another Circuit Using Thevenin’s Theorem

As part of my problem series in this video, I will be using Loop Analysis Thevenin’s Theorem 

Once I am finished with this series of problems I will be posting them in my Stan store, at this web address…https://stan.store/GVB

Find V0 in this circuit using Thevenin’s Theorem.

Firstly we need to determine the open circuit voltage, V0, 

To begin the process remove the 2 kΩ resistor. 

The open circuit voltage at this point is VTH our Thevenin voltage. The Thevenin resistance is then found with the sources in the network removed (voltage sources short-circuited and current sources open circuit)…let’s find the Thevenin voltage first by letting the voltage drop across the 4 kΩ resistor be V1…and letting the voltage drop across the 3kΩ resistor be V2. Then

VTh = V1 + V2…we now need to determine these voltages. 

We know that the current through the 4KΩ resistor… call it I1…is 4 mA due to the current source. Then clearly, Ohm’s law tells us that…

V1 = I1(4kΩ) = (4mA)(4kΩ) = 16V…to find V2 we need to know I2. and KVL around the loop I2 yields this equation

-12+6k(I2 –I1)+3kI2 = 0…well we know what I1 is so we can plug 4mA into our equation and it becomes

-12 + 6kΩ(I2 – 4mA) + 3kΩI2 = 0…

we know that this is a KVL equation so that all the terms in this equation are going voltages and because we built the equation using thousand Ohm resistors and milliamp currents then I'm going to uncluttered the equation to give us something easier to read…

-12 +     6I2 – 4      +    3I2 = 0

This gives us one equation with one unknown… I2. Therefore we can quite easily solve for the value of I2. Collecting like terms we get 9I2 on the left-hand side of the equation and we'll bring all of our whole numbers to the right hand side of the equation which change from negative numbers to positive numbers and adds up to 36. We can now solve the equation for I2 giving us I2 is equal to… 

4 mA… now V2 is just a voltage drop across the 3kΩ resistor which is 3 kΩ times 4 mA = 12 V. This seems odd…We have a 12 V power supply feeding into a 6kΩ resistor. You’d think there is some voltage drop across the 6kΩ resistor…upon closer examination though we see that the current through the 6 kΩ resistor is I1 - I2 or 4 mA - 4 mA which is equal to zero, so the voltage drop across the 6K on resistor is zero meaning V2 is definitely going to equal the same voltage as the power supply 12 V.

Finally we can solve the equation for VTh which… is 16 V+12 V which…is 28 volts.

The Thevenin equivalent resistance is found by…zeroing all sources and looking into the open circuit terminals to determine the Thevinen resistance RTh. From the network we see that the 6k and 3k Ohm resistors are in parallel and that combination is in series with the 4kΩ resistor. 

Thus RTH =4kΩ+3kΩ||6kΩ = 6kΩ

Therefore, the Thevenin equivalent circuit consists of a 28V source in series with the 6kΩ resistor. If we connect the 2kΩ resistor to this equivalent network we obtain this circuit. V0 is the voltage drop across the 2kΩ resistor which we can find using voltage division…which gives us V0 = 7 Volts

Hey there, tech enthusiasts and smart home aficionados!

I'm thrilled to announce that I'll be diving deep into the world of home automation in an exciting new series of blogs and social media posts. Get ready to transform your living space into a futuristic haven of convenience and efficiency!

In the coming weeks, I'll be sharing my insights, reviews, and tips on the latest smart home gadgets and systems. We'll explore cutting-edge products that will revolutionize the way you interact with your home, from AI-powered assistants to energy-saving devices and advanced security solutions.

If you are ready to elevate your living space with home automation, now’s the perfect time to transform your home into a smart, efficient household! In order to explore an incredible range of innovative products that cater to all your smart home needs. 

Simply this website…https://bit.ly/4eGRRtu

Don’t miss out on exclusive discounts available for a limited time! Take the first step towards a smarter home and discover how easy it is to enhance your lifestyle with cutting-edge technology. Your dream home awaits! 

Remember, this video has been brought to you by PSPT, where you will find electrical training videos when you go to this web address, which will also gives you a free copy of my 50 page crib sheets that you can use while viewing any of the courses or just keep handy during your every day work.

Also remember, from my previous videos that you can obtain the latest discounts on battery systems at these web addresses…

➜ Eco Flow…https://shrsl.com/4pthi

➜ Bluetti…https://bit.ly/4fDx2Ba 

➜ Anker…https://shrsl.com/4pplo

➜ Jacquery….https://bit.ly/3YCiw5Y

These sites not only give you unique battery systems that can power things from cell phones or laptops to a complete backup system for your home. Just go to these sites and see what they have to offer. There is no cost or obligation to just browsing.

Blog #38 - Calculating Another Circuit Using Source Transformation

As part of my problem series in this video, I will be using Loop Analysis Using Source Transformation. Once I am finished with this series of problems I will be posting them in my Stan store, at this web address…https://stan.store/GVB

Our task will be to find V0 in this circuit using source transformation.

Recall that when employing source transformation, at a pair of terminals, we can exchange a voltage source V in series with a resistor R subscript v and for a current source, I in parallel with a resistor R subscript I provided that the relationships among these shown parameters exist. 

R subscript V = R subscript I and

I = V/RV…as shown and we can also exchange a current source I in parallel with a resistor R subscript I for a voltage source V in series with a resistor R subscript V. Provided that the relationships among these shown parameters exist…

R subscript V = R subscript I and

V = IR subscript I…as shown

Note that in the original circuit shown here, we have a 12V source in series with a 6kΩ resistor that can be exchanged for a current source in parallel with the resistor. This appears to be a viable exchange since we will then have two current sources in parallel, which we can add algebraically. Performing the exchange yields the above network…

Note that the voltage source was positive at the bottom terminal and therefore the current source points in that direction. 

Replacing the two parallel current sources with one equivalent. Using The Superposition Theorem, we consider the current contribution from each current source…flowing into node A and node B…Node A has 6 minus  2 or 4 A flowing into it  and node B has 6 minus 2 or 4 A flowing out from it… so the two current sources can be replaced by one of 4 A flowing into and out of nodes A & B…shown above..

At this point we can apply current division to obtain a solution for the current in the 4kΩ resistor which is…4/3 mA…then…

V0 = (I4k)(4kΩ) = 16/3 Volts or 5.33 Volts.

Hey there, tech enthusiasts and smart home aficionados!

I'm thrilled to announce that I'll be diving deep into the world of home automation in an exciting new series of blogs and social media posts. Get ready to transform your living space into a futuristic haven of convenience and efficiency!

In the coming weeks, I'll be sharing my insights, reviews, and tips on the latest smart home gadgets and systems. We'll explore cutting-edge products that will revolutionize the way you interact with your home, from AI-powered assistants to energy-saving devices and advanced security solutions.

If you are ready to elevate your living space with home automation, now’s the perfect time to transform your home into a smart, efficient household! In order to explore an incredible range of innovative products that cater to all your smart home needs. 

Simply this website…https://bit.ly/4eGRRtu

Don’t miss out onsive disc excluounts available for a limited time! Take the first step towards a smarter home and discover how easy it is to enhance your lifestyle with cutting-edge technology. Your dream home awaits! 

Remember, this video has been brought to you by PSPT, where you will find electrical training videos when you go to this web address…https://bit.ly/47YB3vh Which will also gives you a free copy of my 50 page crib sheets that you can use while viewing any of the courses or just keep handy during your every day work.

Also remember, from my previous videos that you can obtain the latest discounts on battery systems at these web addresses…

➜ Eco Flow…https://shrsl.com/4pthi

➜ Bluetti…https://bit.ly/4fDx2Ba

➜ Anker…https://shrsl.com/4pplo 

➜ Jacquery…https://bit.ly/3YCiw5Y

These sites give you unique battery systems that can power things from cell phones or laptops to a complete backup systems for your home. Just go to these sites and see what they have to offer. There is no cost or obligation to just browsing.

Blog #37 - Calculating Another Circuit Using Loop Analysis

As part of my problem series in this video, I will be Calculating another circuit using Loop Analysis. Once I am finished with this series of problems I will be posting them in my Stan store, at this web address…https://stan.store/GVB

Find V0 in this circuit using the Principle of Superposition.

To apply superposition, we consider the contribution that each source independently makes to the output voltage V0 . In so doing, we consider each source operating alone and we replace the other source(s). Recall, that in order to replace a voltage source, we replace it with a short circuit since the voltage across a short circuit is zero. In addition, in order to replace a current source, we replace the current source with an open circuit since there is no current in an open circuit.

Consider now the voltage source acting alone. The network used to obtain this contribution to the output V0 is shown above…This shows only the part of V0 that is the contribution due to the 12V source. Using voltage division, that contribution to V0 is… 

V’12 is -12V[4kΩ/(4kΩ+6kΩ+8kΩ)]…(the minus sign is due to the polarity of V12)… and all of that…= -8/3 Volts…The current source contribution to V0 is obtained from this network now shown…Using current division, we find that the contribution from the 6 mA current source, is …6mA[6kΩ/(6kΩ+8kΩ+4kΩ)] = 2 mA which means the voltage contribution of the current source is the voltage drop across the 4kΩ resistor which according to Ohm’s law is = 4kΩ*I’6 mA = 8 Volts…Then superposition states that V0 = V’12 + V’6mA which calculate to…16/3 or 5.33 Volts

Hey there, tech enthusiasts and smart home aficionados! I'm thrilled to announce that I'll be diving deep into the world of home automation in an exciting new series of blogs and social media posts. Get ready to transform your living space into a futuristic haven of convenience and efficiency!

In the coming weeks, I'll be sharing my insights, reviews, and tips on the latest smart home gadgets and systems. We'll explore cutting-edge products that will revolutionize the way you interact with your home, from AI-powered assistants to energy-saving devices and advanced security solutions.

If you are ready to elevate your living space with home automation, now’s the perfect time to transform your home into a smart, efficient household! In order to explore an incredible range of innovative products that cater to all your smart home needs. 

Simply this website…https://bit.ly/4eGRRtu

Don’t miss out on exclusive discounts available for a limited time! Take the first step towards a smarter home and discover how easy it is to enhance your lifestyle with cutting-edge technology. Your dream home awaits! 

Remember, this video has been brought to you by PSPT, where you will find electrical training videos when you go to this web address, which will also give you a free copy of my 50-page crib sheets that you can use while viewing any of the courses or just keep handy during your everyday work.

Also remember, from my previous videos that you can obtain the latest discounts on battery systems at these web addresses…

Eco Flow…https://shrsl.com/4pthi

Bluetti…https://bit.ly/4fDx2Ba 

Anker…https://shrsl.com/4pplo

Jacquery…https://bit.ly/3YCiw5Y

These sites give you unique battery systems that can power things from cell phones or laptops to a complete backup systems for your home. Just go to these sites and see what they have to offer. There is no cost or obligation to just browsing.

Blog #36 - Calculating 3 Currents Using Loop Analysis

As part of my problem series in this video, I will be Calculating 3 Currents Using Loop Analysis.

Once I am finished with this series of problems I will be posting them in my Stan store, at this web addres…https://stan.store/GVB

Use loop analysis to find the loop currents and V0…

The network contains 3 current loops and therefore 3 linearly independent loop equations will be required to determine the unknown currents and voltages. To begin we arbitrarily assign the loop currents as shown…I1, I2 and I3…

The equations for the loop currents are obtained by employing KVL. Remember that each term in the equation is a voltage.

For the loop labeled I1the KVL equation is…

-12 + 1kΩ(I1 – I3) + 1kΩ(I1 – I2) = 0

For the loop labeled I2, the KVL equation is 

1kΩ(I2 – I1) + 1kΩ(I2 – I3) + 2kΩI3 = 0

The third loop contains a current source which forces I3 to be 2 milliamps so the equation is not a KVL equation but very simply tell us that…

I3 = 2mA… in order to simplify the calculation I'm going to make the 1kΩ in both equations

1Ω as long as I remember that the currents inside the brackets are going to be reading in milliamps…now…that leaves us with

-12 + (I1 – I3) + (I1 – I2) = 0 for the first equation and this…

for the second equation (I2 – I1) + (I2 – I3) + 2I3 = 0

So we already know I3 which is 2 milliamps… our task now will be to find a solution for I1 and I2.

Let's get rid of the brackets because they are just cluttering the equations now… then we can easily collect like terms and substituting 2 for I3…

our two equations will look like this…

Working with these two equations I am going to solve for I2 by first multiplying the bottom equation by 2…making it

-2I1 + 8I2 = 4…we now add the two equation to get 7I2 = 18… which we can now solve for I2

We are now 2/3 of the way there we just have to solve for I1… using the equation 2I1 - I2 = 14, we know what I2 is so we can just plug that into the equation to give us

2I1 - 18/7 = 14…re-arranging the terms…

2I1 = 14 + 18/7… which is the same as…

2I1 = 98/7 + 18/7…or…

I1 = 116/7

Once again, KCL is satisfied at every node and furthermore, KVL is satisfied around every closed path.

All that is left to do now is calculate V0 which we do using ohms law…Plugging in our known values we get…

(18/7 mA)(1kΩ)…or

2.57 Volt… and we're done!

Hey there, tech enthusiasts and smart home aficionados! 

I'm thrilled to announce that I'll be diving deep into the world of home automation in an exciting new series of blogs and social media posts. Get ready to transform your living space into a futuristic haven of convenience and efficiency!

In the coming weeks, I'll be sharing my insights, reviews, and tips on the latest smart home gadgets and systems. We'll explore cutting-edge products that will revolutionize the way you interact with your home, from AI-powered assistants to energy-saving devices and advanced security solutions.

If you are ready to elevate your living space with home automation, now’s the perfect time to transform your home into a smart, efficient household! In order to explore an incredible range of innovative products that cater to all your smart home needs. 

Simply go to this website…https://bit.ly/4eGRRtu

Don’t miss out on exclusive discounts available for a limited time! Take the first step towards a smarter home and discover how easy it is to enhance your lifestyle with cutting-edge technology. Your dream home awaits! 

Remember, this video has been brought to you by PSPT, where you will find electrical training videos when you go to this web address, which will also gives you a free copy of my 50 page crib sheets that you can use while viewing any of the courses or just keep handy during your every day work.

Also remember, from my previous videos that you can obtain the latest discounts on battery systems at these web addresses…

Eco Flow https://shrsl.com/4pthi

Bluetti  https://bit.ly/4fDx2Ba

Anker https://shrsl.com/4pplo

Jacquery https://bit.ly/3YCiw5Y

These sites not only give you unique battery systems that can power thing from cell phones or laptops to a complete back up systems for your home. Just go to these sites and see what they have to offer. There is no cost or obligation to just browsing.

Blog #35 - Calculating Current Using Norton’s Theorem

As part of my problem series in this video, I will be Calculating Current Using Norton’s Theorem. Once I am finished with this series of problems I will be posting them in my Stan store at this web address…https://stan.store/GVB

Our task is to calculate the value of the current IL through the resistor RL in this DC network…this time using Norton’s theorem.

Norton’s theorem states: Any two-terminal linear dc network can be replaced by an equivalent circuit consisting of a constant-current source IN in parallel with a resistor RN.

When using “Norton’s Theorem”  to find the Norton’s Resistance RN. The network is redrawn with the source of emf replaced by a short circuit. (If a current source is present, it is replaced by an open circuit.) 

The resistance of the redrawn network as seen by looking back into the network from the load terminals is calculated. 

This value is RN, where RN = (50 Ω) + (100 Ω)||(100 Ω) = 100 Ω. A comparison of Thevenin’s Theorem shows that RN = RTh.

When Using “Norton’s Theorem” to find the Norton’s Constant-Current Source IN. Terminals A - B are short circuited…

IN is the short-circuit current between terminals A and B, the total resistance that the 100 V battery voltage sees looking into the circuit is

RTotal = 100 Ω + (100 Ω || 50 Ω) = 1331/3 Ω and ITotal the total current flowing from the hundred volt power supply is…according to Ohm's law is

E/RTotal = (100/1331/3 ) = .75 A

Then from the current-divider rule: IN = (3/4 A)(100)/(100 + 50) = 0.5A.

The Norton equivalent circuit consists of IN in parallel with RN. The load resistor RL is connected across the output terminals of Norton equivalent circuit. From the current-divider rule:

IL = (0.5A)[100/(100 + 50)] = 1/3 A.

This Norton solution solved the same circuit as the Thevenin solution. It is often convenient or necessary to have a voltage source rather than a current source or a current source rather than a voltage source. This slide shows the source conversion equations which indicate that a Thevenin equivalent circuit can be replaced by a Norton equivalent circuit, and vice versa, provided that the following equations are used:

RN = RTh

ETh = (IN)(RTh) = IN RN, and…

IN = ETh /RN = ETh /RTh. The conversion between Thevenin and Norton equivalents is generally known as a source transformation.

Hey there, tech enthusiasts and smart home aficionados! 

I'm thrilled to announce that I'll be diving deep into the world of home automation in an exciting new series of blogs and social media posts. Get ready to transform your living space into a futuristic haven of convenience and efficiency!

In the coming weeks, I'll be sharing my insights, reviews, and tips on the latest smart home gadgets and systems. We'll explore cutting-edge products that will revolutionize the way you interact with your home, from AI-powered assistants to energy-saving devices and advanced security solutions.

If you are ready to elevate your living space with home automation, now’s the perfect time to transform your home into a smart, efficient household! In order to explore an incredible range of innovative products that cater to all your smart home needs. 

Simply this website…https://bit.ly/4eGRRtu

Don’t miss out on exclusive discounts available for a limited time! Take the first step towards a smarter home and discover how easy it is to enhance your lifestyle with cutting-edge technology. Your dream home awaits! 

Remember, this video has been brought to you by PSPT, where you will find electrical train training videos when you go to this web address…https://bit.ly/47YB3vh…which will also give you a free copy of my 50 page crib sheets that you can use while viewing any of the courses or just keep handy during your every day work.

Blog #34 - Calculating Current using Thevenin’s Theorem

As part of my problem series in this Blog, I will be Calculating Current Using Thevenin’s Theorem.

Once I am finished with this series of problems I will be posting them in my Stan store,at this web address.

Before proceeding I want to explain the three WEB addresses that you will be directed to using. You have already seen the first…https://stan.store/GVB…this is the web address of my Stan store which will give you direct access to all of my electrical courses. 

On the last page  you'll find an address,,,HTTP://bitl.ly/47YB3vh… that will direct you to obtaining the 50 page crib sheets and notes that will not only be handy when you're taking any of the courses in my Stan store, but also for reference during any time during your career. Here, you will also be asked for your email address which will not be shared or distributed anyway but it will allow me to keep in touch and let you know of any additions or updates to my courses and blogs.

➜ Near the ending the video I will be introducing you to a supplier of electrical products…https://shrsl.com/4pplo…which in my estimation are a value worthy of paying attention to.

Task Problem: Calculate the value of the current IL through the resistor RL in this dc network using Thevenin’s Theorem.

Thevenin’s theorem states that: “Any two-terminal linear network containing resistances and sources of emf and current may be replaced by a single source of emf in series with a single resistance. The emf of the single source will be called ETh, at the network terminals A & B. The single-series resistance, called RTh, is the resistance between the network terminals A & B when all of the independent sources are replaced by their internal resistances”.

When the Thevenin equivalent circuit is determined for a network, the process is known as “thevenizing” the circuit.

“Thevenizing” the circuit to find the Thevenin Voltage ETh.

The load resistor is removed. The open-circuit terminal voltage of the network is calculated;  this value is ETh. Because no current can flow through R3, the voltage ETh is the same as the voltage across resistor R2. Using the voltage-divider rule we find that…

ETh = (100 V) X [100/(100 + 100)] = 50 V.

Next when “thevenizing” the circuit we find the Thevenin Resistance RTh.

The network is redrawn with the source of emf replaced by a short circuit. (If a current source is present, it is replaced by an open circuit.) 

The resistance of the redrawn network as seen by looking back into the network from the load terminals is calculated. We call this value is RTh,

where RTh = (50 Ω) + (100 Ω)||(100 Ω) = 100 Ω.

The Thevenin equivalent circuit consists of the series combination of ETh and RTh. 

The load resistor RL is connected (or re-connected) across the output terminals of this equivalent circuit… 

RT = RTA + RTh  = 100 + 50 = 150 Ω, and 

IL =  ETH/RT = 50/150 = 1/3 A.

With respect to the terminals only, the Thevenin circuit is equivalent to the original linear network.  

Changes in RL does not require any calculations for a new Thevenin circuit. The simple series Thevenin circuit can be used to solve for load currents each time RL is changed.

I want to introduce you to another product that’s out there that is worthy of paying attention to. The Anker SOLIX F2000 Generator. 

To find out more about this battery generator and to keep up-to-date on any sales or discounts are available simply go to the anchor site at this web address…https://shrsl.com/4pplo… And by using this web address you can get $800 off the original price…. Or just browse through the various options on this site… There is no charge for just looking but you might find something that is available at a discounted price at this particular time.

Remember, this video has been brought to you by PSPT, where you will find electrical train training videos when you go to this web address,..https://bit.ly/47YB3vh… which will also give you a free copy of my 50 page crib sheets that you can use while viewing any of the courses or just keep handy during your every day work.

Blog #33 - Calculating Current Using the Superposition Theorem

Calculate the value of the current through resistor R3 in this dc network using the superposition theorem. The superposition theorem states: In any linear network containing more than one source of electromotive force (emf) or current, the current through any branch is the algebraic sum of the currents produced by each source acting independently.

Because voltage source EB has no internal resistance, the source EB is replaced by a short circuit. The total resistance seen at EA…we will call it RTA = 100 + (100 || 100)…written out or expanded looks like this…100 + (100)(100)/(100 + 100) = 150 Ω

The total current flowing out of EA according to Ohm’s Law is ITA and…equal to 30/150…or 200 mA. From the current-divider rule, I3A = 200 mA/2 = 100 mA & I2A = 200 mA/2 = 100 mA.

Returning to our original circuit let's look at the contribution from Voltage source EB.

Because EA has no internal resistance, the EA source is replaced by a short circuit. 

As you can see the circuit is symmetrical, so the resistance that the B power supply sees…call it, RTB…the total resistance at EB is also equal to 100 + (100 || 100)… which is 150 Ω therefore, ITB = EB/RTB = 15/150 = 100 mA. (keep in mind that the B power supply polarity is the opposite to the A power supply therefore the current will be flowing out in this direction). 

From the current-divider rule, I2B & I3B = 100 mA/2 = 50 mA each.

The algebraic sum of the component currents I3A and I3B is used to obtain the true magnitude and direction of the current through R3, which is IR3 = I3A - I3B = 100 - 50 = 50 mA (in the direction of I3A).

The superposition theorem simplifies the analysis of a linear network having more than one source of emf. This theorem may also be applied in any network containing dc or ac sources of emf.

I want to introduce you to another product that’s out there that is worthy of paying attention to. The Anker SOLIX F2000 Generator

To find out more about this battery generator and to keep up-to-date on any sales or discounts are available simply go to the anchor site at this web address…https://shrsl.com/4pplo… And by using this web address you can get $800 off the original price…. Or just browse through the various options on this site… There is no charge for just looking but you might find something that is available at a discounted price at this particular time.

Remember, this video has been brought to you by PSPT, where you will find electrical train training videos when you go to this web address,..https://bit.ly/47YB3vh… which will also give you a free copy of my 50 page crib sheets that you can use while viewing any of the courses or just keep handy during your every day work.

Blog #32 - Calculation of a DC circuit using nodal analysis

As part of my problem series in this video, I will be analyzing the two loop circuit with multiple resistors and 2 power supplies using nodal analysis. Once I am finished with this series of problems I will be posting them in my Stan store, at this web address…https://stan.store/GVB

Calculate the current through each of the resistors in this DC circuit using Nodal Analysis or the branch-current method of solution. 

I’m going to re-draw the circuit slightly just to make the node more obvious.

Step #1 Label the Circuit … all nodes. One of the nodes…node A, is chosen as the reference node. It can be thought of as a circuit ground, which is at zero voltage or ground potential. 

Node B and node D are already known to be at the potential of the source voltages. The voltage at node C the voltage VC is unknown.

Let’s assume that VC > the voltage at node B and VC > the voltage at node D when all three currents are drawn arbitrarily… remember, these directions are arbitrary and may change depending on the outcome of the mathematics.

The direction of I1, I2, and I3 is assumed to be emanating from node C, and toward the reference node A.

Step #2 Write Kerckhoff's current law at Node C…I1 + I2 + I3 = 0

Step #3 Express Currents in Terms of Circuit Voltages Using Ohm’s Law

I1 = V1/R1 = (VC - 8)/2, 

I2 = V2/R2 = (VC - 24)/1, and 

I3 = V3/R3 = VC/4.

Substituting the current equations obtained in Step 3 into Kerckhoff’s Current Law of Step 2, we find I1 + I2 + I3 = 0 becomes 

(VC - 8)/2 + (VC - 24)/1 + VC/4 = 0. removing the denominators by multiplying the equation by 4…

and removing the brackets…gives us this 2VC - 16 + 4VC - 96 + VC = 0

Bringing all of the unknowns to the left-hand side of the equation gives us…2VC + 4VC + VC = 112 which reduces to…this 

7VC = 112 and this simple equation can be solved to obtain VC = 16 Volts.

Solving for the current is very simple… All we have to do is substitute 16 for the voltage VC…

in our equation for I1…we get 4 Amps and in our equation for I2…we get -8 Amps  and in our equation for I3…we get 4 Amps 

And not surprisingly we get the same answers that we have previously found for the currents. Noticed that for I2 we obtained an answer of -8 Amps which means we assume the wrong direction in the beginning and this means that this current is actually 8 Amps flowing in the other direction.

I want to introduce you to another product that’s out there that is worthy of paying attention to. The Anker SOLIX F2000 Generator. 

To find out more about this battery generator and to keep up-to-date on any sales or discounts are available simply go to the anchor site at this web address…https://shrsl.com/4pplo...And by using this web address you can get $800 off the original price…. Or just browse through the various options on this site… There is no charge for just looking but you might find something that is available at a discounted price at this particular time.

Remember, this blog has been brought to you by PSPT, where you will find electrical train training videos when you go to this web address…https://bit.ly/47YB3vh…which will also give you a free copy of my 50 page crib sheets that you can use while viewing any of the courses or just keep handy during your every day work.

Blog #31 - Loop or Mesh Analysis - analyzing a two loop circuit with multiple resistors and 2 power supplies.

As part of my problem series in this blog, I will be analyzing a two loop circuit with multiple resistors and 2 power supplies.

Once I am finished with this series of problems I will be posting them in my Stan store, at the WEB address shown.

Before proceeding I want to explain the three WEB addresses that you will be directed to using. You have already seen the first…https://stan.store/GVB…this is the web address of my Stan Store which will give you direct access to all of my electrical courses. 

On the last page, you'll find an address that will direct you to obtain the 50-page crib sheets and notes that will not only be handy when you're taking any of the courses in my Stan Store but also for reference during any time during your career. Here, you will also be asked for your email address which will not be shared or distributed anyway but it will allow me to keep in touch and let you know of any additions or updates to my courses and blogs.

Near the end of this blog, I will be introducing you to a supplier of electrical products which in my estimation are a value worthy of paying attention to.

Looking at the same circuit, this time we are going to calculate the current through each of the resistors in this DC circuit using mesh or loop current analysis.

The term mesh is used because of the similarity in appearance between the closed loops of the network and a wire mesh fence. One can view the circuit as a “window frame” and the meshes as the “windows.” A mesh is a closed pathway with no other closed pathway within it. A loop is also a closed pathway, but a loop may have other closed pathways within it. Therefore, all meshes are loops, but all loops are not meshes. For example, the loop made by the closed path BCDAB is not a mesh because it contains two closed paths: BCAB and CDAC.

Step #1 Draw in the loop currents…Loop currents I1 and I2 are drawn in the clockwise direction in each window. The loop current or mesh current is a fictitious current that enables us to obtain the actual branch currents more easily. The number of loop currents required is always equal to the number of windows of the network. This assures that the resulting equations are all independent. Loop currents may be drawn in any direction, but assigning a clockwise direction to all of them simplifies the process of writing equations…It leads to less confusion and similar to the previous solution, if loop currents turn out to be negative then the assumed the direction of that current is opposite to that of our original assumption.

In Step #2 we indicate the Polarities of each voltage drop within Each Loop.

Identify polarities to agree with the assumed direction of the loop currents.

Starting with Loop #1 at R2…then R3 and ending with E1. Notice that the voltage drops across the resistors are positive w.r.t. the current flow and the voltage drop across the power supply is negative because it is not dropping the voltage in the direction of the current but doing just the opposite providing a voltage rise.

Writing the KVL around each mesh in any direction…it is convenient to follow the same direction as the loop current therefore…

Loop #2…Notice that the polarities across R3 are the opposite for each loop current and the polarities of E1 and E2 are unaffected by the direction of the loop currents passing through them. Also with the assumed current flow of I2…E2 provides a voltage drop and therefore considered positive in the loop equation.

Step #3 Write KVL around Each Mesh following the same direction as the loop current:

for the I1 Loop ☞ we get -8 + 2I1 + 4(I1 - I2) = 0

for the I2 Loop ☞ we get +24 + 4(I2 - I1) + I2 = 0

We can now use these two equations to solve for I1 and I2 

Let's rewrite these two equations removing the brackets.

We can now collect the like terms and end up with these two equations.

The first equation can be simplified by dividing both the left-hand side and the right hand side by a factor of 2 and rewriting both equations gives us these two equations. We would now like to reduce the two equations to one by multiplying the first equation by 5…which gives us 15I1 - 10I2 = 20 and the second equation by 2…which gives us 8I1 - 10I2 = 48.

We can now reduce the two equations to one with one unknown by subtracting the second from the first. This removes I2. And leaves us with…

7I1 = -28 This allows us to solve for I1…

I1 = -4

We now will solve for I2…by using this equation…3I1 - 2I2 = 4 and replacing I1 with -4 to give us this equation which simplifies to - 2I2 = 16 and allows us to solve for I2 = -8 Amps.

The minus signs for I1 & I2 indicate that the two loop currents flow in a direction opposite to that assumed; that is, they both flow counterclockwise. Loop current I1 is therefore 4 Amps in a counter clockwise direction and loop current I2 is 8 Amps also in a counter clockwise direction…The true direction of loop current I2 through resistor R3 is from C to A. The true direction of loop current I1 through resistor R3 is from A to C. Therefore, in reality, the current through R3 is (I2 - I1) or 8 - 4 = 4 A in the direction of CA.

I want to introduce you to another product that’s out there that is worthy of paying attention to. The Jackery Solar Generators are available in various capacities. Depending on the running and starting watts required, you can choose the right size of solar generator. For example, you can choose a small solar generator if you want to run laptops or cell phones or prehaps a small freezer. On the other hand, a large solar generator would be ideal for extended power outages.

To find out more about these battery generators and to keep up-to-date on any sales or discounts are available simply go to this WEB address. https://bit.ly/3YCiw5Y

Remember, this video has been brought to you by PSPT, where you will find electrical train training videos when you go to this web address, which will also give you a free copy of my 50 page crib sheets that you can use while viewing any of the courses or just keep handy during your every day work.

Blog #30 - Residential Battery Backup Generators

Did you know that major power outages in North America have increased by 67% since 2000? We've seen firsthand how devastating unexpected blackouts can be for families. Whether it's losing hundreds of dollars in spoiled food or dealing with dangerous winter outages, having a reliable backup power solution isn't just a luxury – it's becoming a necessity. In this next series of blogs, I'll walk you through the subject of residential battery backup generators, from selecting the right size to maintaining your investment.

Residential battery backup generators offer homeowners a reliable energy storage solution to ensure seamless power during outages. These advanced systems, distinct from traditional gas generators, use rechargeable batteries to store and convert electricity efficiently. Their quiet operation, minimal maintenance needs, and eco-friendly nature make them an attractive alternative for comprehensive home power management. By integrating directly with home electrical systems, these backup solutions deliver automatic, whole-house coverage and support critical appliances like HVAC and refrigerators. Whether considering Tesla Powerwall alternatives or evaluating battery backup installation, understanding their features is essential for making an informed investment in home energy security.

We will discover the best residential battery backup generators available today comparing whole-house systems, learning the essential features, and find the perfect power solution for your home.

At their core, residential battery backup generators are energy storage systems designed to provide emergency power during grid outages. They work by storing electricity in large battery banks, which can then be converted back into usable household current when the power goes out. This stored energy allows you to keep your critical home systems and appliances running until utility service is restored.

The key difference lies in the power source. Traditional gas-powered generators rely on an internal combustion engine to produce electricity, while battery backup systems use rechargeable batteries. This makes battery backups much quieter, more efficient, and more environmentally friendly than their noisy, fume-producing counterparts. Battery systems also eliminate the need to store and refuel with gasoline or propane.

Key Components: Inverter, Battery Bank, and Transfer Switch

The three essential components of a residential battery backup system are the inverter, the battery bank, and the transfer switch. The inverter converts the battery's stored DC power into usable AC electricity for your home. The battery bank is where the energy is stored, typically made up of multiple deep-cycle batteries. And the transfer switch automatically detects a grid outage and seamlessly switches your home's circuits over to the backup power.

Advantages Over Conventional Gas Generators

Beyond the benefits of noise and emissions reduction, battery backups offer several other key advantages. They require minimal maintenance, with no oil changes or tune-ups needed. They also start up instantly when the power goes out, without the delay of a gas generator. And because they're integrated directly into your me's electrical system, battery backups provide whole-house coverage, not just for individual circuits or appliances.

How Battery Backup Systems Integrate with Home Electrical Systems

Residential battery backup generators are designed to integrate directly with your home's existing electrical infrastructure. They connect to your main service panel, allowing them to automatically power critical circuits like the HVAC system, refrigerator, and essential lighting when the grid goes down. This integration also enables advanced features like load shedding and smart home integration for remote monitoring and control.

Looking at the outside of the smart panel, it looks like this…and here is where you connect, up to 3 DELTA Pro Ultras. opening the front panel to have a look inside, we see… 

The Antenna used for communications 

The Interlock for manual transfer of an external stand-by generator 

The external stand-by Generator main circuit breaker 

The  Grid main circuit breaker 

This is where the individual Branch circuit breakers will be located 

Nothing is located here which is the Dead front cover

Located here is the Emergency stop button

Power input, output button

Three Power input, output ports

The Smart Home Panel 2 can be used to connect

to a generator.

It is also used as a sub panel, to connect with the main panel, to access grid power, which can seamlessly feed residential loads directly and, or charge the delta pro battery pacts.

 At the same time, you can connect solar panels to the power station. 

This smart home panel can intelligently manage all these power sources, grid, batteries, solar panels, and gas powered generators.

If you are looking for reliable power when you need it most? Look no further than the top names in portable power solutions: (The 4 sites listed below are live… Simply click on each to go there and experience special savings… There is no charge for for just looking.)

EcoFlow, https://bit.ly/3MjaFTV

Anker, https://bit.ly/4dEzzbW

Bluetti, https://bit.ly/3yxdCNE  and 

Jackery, https://bit.ly/3YCiw5Y

These industry leaders offer cutting-edge battery backup systems to keep you powered up during outages, outdoor adventures, or off-grid living.

EcoFlow's DELTA series provides expandable home backup power, while their RIVER line offers compact portability. Anker's PowerHouse series combines high capacity with fast charging technology. Bluetti's modular power stations scale to meet your energy needs, from camping to whole-home backup. Jackery's Explorer series delivers solar-ready power in rugged, portable packages.

Whether you need a small power bank for your devices or a whole-home backup solution, these brands have you covered. Their innovative designs, reliable performance, and versatile charging options ensure you'll never be left in the dark.

Don't wait for the next power outage to catch you unprepared. Visit the displayed WEB sites to compare the top models and find the perfect battery backup system for your needs.

Blog #29 - Y - Y Transformers...Phase to Phase from Phase to Neutral Voltages

This is a continuation of my series on Electromagnetism. In this blog, I will be looking at a Y - Y or star star-connected power transformers and obtaining Phase to Phase from Phase to Neutral Voltages. You can find this topic in my course entitled…“Electrical 3 Phase Power Transformers Fundamentals”. You can access this, and my other courses in my Stan store, at this web address…https://stan.store/GVB

As I have said the Star - Star Connected transformers can deliver two voltage levels on both the primary and secondary...ie Ph - Neutral or Ph - Ph. Let's look at the primary side only, for example. The secondary side is exactly the same only at different voltage levels of course. We can use the phase to neutral voltages as seen here or we can use the phase to phase voltages…The RW voltage, for example, is the difference between the R phase voltage and the W phase voltages or, R minus W which is the red phase vector plus the negative W phase vector which gives us the R to W phasor.

Similarly we can find the WB phase to phase voltage…

…and the BR phase voltage.

I want to introduce you to three vendors that I am promoting and will be promoting for the next little while. They happen to be three of the most popular power supply vendors on the market today. I will be providing links to their sites which if you use, you will be able to take advantage of a reduction in their cost price and as well…I will receive a small commission for promoting them but rest assured they are quality products. So stay tuned next three slides will provide the information that you are looking for.

First off is EcoFlow… I have introduced you to this vendor earlier and it is still one of the vendors that are on the top of my list. They have an exciting line of various power supplies which you can view and recognize a price reduction by going to this website…https://bit.ly/3MjaFTV… Remember that the address is case sensitive.

Next on the list is Anker… their range of products are similar but they also cater to the smaller output devices that are very portable. Again you can take advantage of some small sales by going to this WEB address…https://shrsl.com/4nisu

And finally there is Bluetti who also cater to the smaller output devices as well as having the larger standby power supplies… You can view their full range of products and again take it vantage of price reductions by going to this WEB address…https://shrsl.com/4nisy

My free “electrical crib sheets”…https://bit.ly/3VJle8z

See the full range of ANKER products…https://bit.ly/3YFQpmO

Directly access my Stan Store courses…https://stan.store/GVB

Blog #28 - Y - Y or Star Star Connected Power Transformers

Star - Star (or sometimes called Y – Y) Connected transformers can deliver two voltage levels (phase to phase or phase to neutral) on both the primary and secondary. Also the terminal bushings can be gradient insulated and hence are less expensive to manufacture...with this type of connection...One terminal of the Primary terminals is connected to the system (Lines, Busses etc.). The other terminals are connected together and form a primary neutral. Similarly on the secondary, one terminal is connected to the LV system (Lines, Busses etc.). The other terminals are connected together and form a secondary neutral.

The high voltage H1 terminals are connected to indivi­dual phase conductors and the high voltage H2 terminals are connected together to form the neutral. The low voltage X1 terminals are connected to indivi­dual phase conductors and the low voltage X2 terminals are connected together to form the neutral. The transformer having its H1 terminal connected to the R phase is referred to as the red phase transformer. Likewise the transformer with the H1 terminal connected to the W phase is referred to as the white phase transformer (in this case I have coloured it green as white on white doesn't show up too well) and the transformer with its H1 terminal connected to the B phase is referred to as the blue phase transformer.

The vectors or phasors look like this…

Red phase both primary and secondary are in phase (disregarding the magnitudes). The White phase both primary and secondary are in phase (disregarding the magnitudes). The Blue phase both primary and secondary are in phase (disregarding the magnitudes). The H2 & X2 terminals form the neutral for both primary and secondary respectively. They are not necessarily connected together. The phasors are 120 degrees apart and rotating counter-clockwise.

Transformers for star connections with solidly grounded neutrals may be made with only one terminal brought out in a bushing and the winding insulation graded so that less insulation is used towards the grounded end of the winding. This results in considerable saving in cost of transformers.

In this blog, I want to introduce you to three vendors that I am promoting and will be promoting for the next little while. They happen to be three of the most popular power supply vendors on the market today. I will be providing links to their sites which if you use, you will be able to take advantage of a reduction in their cost price and as well…I will receive a small commission for promoting them but rest assured they are quality products. So stay tuned next three slides will provide the information that you are looking for.

First off is EcoFlow… I have introduced you to this vendor earlier and it is still one of the vendors that are on the top of my list. They have an exciting line of various power supplies which you can view and recognize a price reduction by going to this website…https://bit.ly/3MjaFTV… Remember that the address is case sensitive.

Next on the list is Anker… their range of products are similar but they also cater to the smaller output devices that are very portable. Again you can take advantage of some small sales by going to this WEB address…https://shrsl.com/4nisu

And finally there is Bluetti who also cater to the smaller output devices as well as having the larger standby power supplies… You can view their full range of products and again take it vantage of price reductions by going to this WEB address…https://shrsl.com/4nisy

My free “electrical crib sheets”…https://bit.ly/3VJle8z

See the full range of ANKER products…https://bit.ly/3YFQpmO

Directly access my Stan Store courses…https://stan.store/GVB

Blog #27 - 3 Phase Transformers

3 Phase Transformers can be thought of as three single phase transformers, each consisting of a primary winding linked magnetically to the secondary.

They become a 3 phase unit by virtue of their excitation voltage…

…and how they are connected to each other. and how they are connected to one another. They may also share the same core, but may be considered individually. Here they are energized by three voltage phasors that are out of phase by 120 degrees, but are joined at one point (neutral).

The phasors are usually considered rotating counter-clockwise.

In this blog, I want to remind you of the three vendors that I am promoting and will be promoting for the next little while. They happen to be three of the most popular power supply vendors on the market today. I will be providing links to their sites which if you use, you will be able to take advantage of a reduction in their cost price and as well…I will receive a small commission for promoting them but rest assured they are quality products. So stay tuned next three slides will provide the information that you are looking for.

First off is EcoFlow… I have introduced you to this vendor earlier and it is still one of the vendors that are on the top of my list. They have an exciting line of various power supplies which you can view and recognize a price reduction by going to this website…https://bit.ly/3MjaFTV… Remember that the address is case sensitive.

Next on the list is Anker… their range of products are similar but they also cater to the smaller output devices that are very portable. Again you can take advantage of some small sales like going to this WEB address…https://shrsl.com/4nisu

And finally there is Bluetti who also cater to the smaller output devices as well as having the larger standby power supplies… You can view their full range of products and again take it vantage of price reductions by going to this WEB address…https://shrsl.com/4nisy

My free “electrical crib sheets”…https://bit.ly/3VJle8z

See the full range of ANKER products…https://bit.ly/3YFQpmO

Directly access my Stan Store courses…https://stan.store/GVB

Blog #26 - Three Phase Transformers

This is a continuation of my series on Electromagnetism. In this video I will be introducing three phase power as it relates to three phase transformers. You can find this topic in my course entitled…“Electrical 3 Phase Power Transformers Fundamentals”. You can access this, and my other courses in my Stan store, at this web address…https://stan.store/GVB

When considering 3 phase power generation you can assume that it is made up of 3 single phase generators connected together on one terminal. The generated voltage vectors are 120 degrees apart. Rotating counter clockwise at 60 cps. The loads can be connected in various configurations. Shown here is a “Y” connected load. However, the load could be any configuration.

In this blog, I want to introduce you to three vendors that I am promoting and will be promoting for the next little while. They happen to be three of the most popular power supply vendors on the market today. I will be providing links to their sites which if you use, you will be able to take advantage of a reduction in their cost price and as well…I will receive a small commission for promoting them but rest assured they are quality products. So stay tuned; the next three slides will provide the information that you are looking for.

First off is EcoFlow… I have introduced you to this vendor earlier and it is still one of the vendors that are on the top of my list. They have an exciting line of various power supplies which you can view and recognize a price reduction by going to this website…https://bit.ly/3MjaFTV. Remember that the address is case sensitive.

Next on the list is Anker… their range of products are similar but they also cater to the smaller output devices that are very portable. Again you can take advantage of some sales by going to this WEB address…https://shrsl.com/4nisu

And finally there is Bluetti…who also cater to the smaller output devices as well as having the larger standby power supplies… You can view their full range of products and again take it vantage of price reductions by going to this WEB address…https://shrsl.com/4nisy

My free “electrical crib sheets”…https://bit.ly/3VJle8z

See the full range of ANKER products…https://bit.ly/3YFQpmO

Directly access my Stan Store courses…https://stan.store/GVB

Blog #25 - The Real Transformer

This is a continuation of my series on Electromagnetism. In this blog I will be looking at The Real Transformer. You can find this topic in my course entitled…“Electrical 3 Phase Power Transformers Fundamentals”. You can access this, and my other courses in my Stan store, at this web address…https://stan.store/GVB

In order to make the calculations required of a Real Transformer we simply use an ideal transformer with “add-ons” that when added to the circuit produce that “equivalent” results. This is know as the “Equivalent Circuit” of a transformer. Modeling the copper losses or resistive losses in the primary and secondary windings of the core, are represented in the equivalent circuit by R1 and R2. Modeling the primary & secondary leakage flux, are represented in the equivalent circuit by L1 and L2, The core excitation is modeled by LM. and the core eddy current and hysteresis losses is modeled by RC.

Anker’s has just released a peek at their most advanced multi device fast charging line-up. In order to check out this advanced lineup…Simply go to this web address…https://bit.ly/3YFQpmO

This video is part of my “Electrical Technical Information” series! Be sure and stay tuned, as I will also, from time to time, be reviewing electrical products, that in my opinion are worthy of paying attention to. This address…https://bit.ly/3VJle8z...will give you access to the supplier of aforementioned products and it is also the connection to obtain a free, copy of my 50 page “Electrical Power” crib sheets.

My free “electrical crib sheets”…https://bit.ly/3VJle8z

See the full range of ANKER products…https://bit.ly/3YFQpmO

Directly access my Stan Store courses…https://stan.store/GVB

Blog #24 - The Real Transformer

This is a continuation of my series on Electromagnetism. In this blog I will be looking at The Real Transformer. You can find this topic in my course entitled…“Electrical 3 Phase Power Transformers Fundamentals”. You can access this, and my other courses in my Stan store, at this web address…https://stan.store/GVB

The ability of iron or steel to carry magnetic flux is much greater than it is in air, and this ability to allow magnetic flux to flow is called permeability. Most transformer cores are constructed from low carbon steels which can have permeability's in the order of 1500 compared with just 1.0 for air. This means that a steel core can carry a magnetic flux 1500 times better than that of air. However, when a magnetic flux flows in a transformers steel core, two types of losses occur in the steel. One termed “eddy current losses” and the other termed “hysteresis losses”.

In REAL TRANSFORMERS several non-ideal factors occur three of the major ones are:

Copper losses (I2R)

Leakage Flux losses

Core Excitation and

Core losses 1) Eddy currents 2) Hysteresis losses

Transformer Eddy Current Losses are caused by the flow of circulating currents induced into the steel caused by the changing magnetic flux around the core. These circulating currents are generated because the changing magnetic flux sees the core as a single loop of wire. Since the iron core is a good conductor, the eddy currents induced by a solid iron core will be large. Eddy currents do not contribute anything towards the usefulness of the transformer, but instead they oppose the flow of the induced current by acting like a negative force generating resistive heating and power loss within the core.

Eddy current losses within a transformer core can not be eliminated completely, but they can be greatly reduced and controlled by reducing the thickness of the steel core. Instead of having one big solid iron core as the magnetic core material of the transformer or coil, the magnetic path is split up into many thin pressed steel shapes called “laminations”.

These laminations are insulated from each other by a coat of varnish to increase the effective resistivity of the core thereby increasing the overall resistance to limit the flow of the eddy currents. The result of all this insulation is that the unwanted induced eddy current power-loss in the core is greatly reduced, and it is for this reason why the magnetic iron circuit of every transformer and other electro-magnetic machines are all laminated. Using laminations in a transformer construction reduces eddy current losses.

Transformer Hysteresis Losses are caused because of the friction of the molecules against the flow of the magnetic lines of force required to magnetise the core, which are constantly changing in value and direction first in one direction and then the other due to the influence of the sinusoidal supply voltage. This molecular friction causes heat to be developed which represents an energy loss to the transformer. Excessive heat loss can overtime shorten the life of the insulating materials used in the manufacture of the windings and structures.

Also, transformers are designed to operate at a particular supply frequency. Lowering the frequency of the supply will result in increased hysteresis and higher temperature in the iron core. So reducing the supply frequency from 60 Hertz to 50 Hertz will raise the amount of hysteresis present, decreased the VA capacity of the transformer.

But there is also another type of energy loss associated with transformers called “copper losses”. Transformer Copper Losses are mainly due to the electrical resistance of the primary and secondary windings. Most transformer coils are made from copper wire which has resistance. This resistance opposes the magnetising currents flowing through them. Not only that, when a load is connected to the transformers secondary winding, large electrical currents flow in both the primary and the secondary windings, electrical energy and power (or the I2 R) losses occur as heat. Generally copper losses vary with the load current, being almost zero at no-load, and at a maximum at full-load when current flow is at maximum.

A transformer’s rating can be increased by better design and transformer construction to reduce these copper losses. Transformers with high voltage and current ratings require conductors of large cross-section to help minimise their copper losses. Increasing the rate of heat dissipation (better cooling) by forced air or oil, or by improving the transformers insulation so that it will withstand higher temperatures can also increase a transformers rating.

Anker’s has just released a peek at their most advanced multi device fast charging line-up. In order to check out this advanced lineup…Simply go to this web address…https://bit.ly/3YFQpmO

My free “electrical crib sheets”…https://bit.ly/3VJle8z

See the full range of ANKER products…https://bit.ly/3YFQpmO

Directly access my Stan Store courses:…https://stan.store/GVB

Blog #23 - The Ideal Transformer

If we wind 2 coils on a steel core we can cause almost all of the flux to link both coils and we can further hypostasise the case in which 100% of the flux is linked. In this ideal case it is call an“ideal transformer”. Now let's input a sinusoidal AC voltage on the red coil on the left. This is known as the primary winding. This AC voltage input will cause a small current to flow in the primary coil. The amount of current flowing is limited by the reactance of the primary coil. In an ideal transformer this reactance is 100% inductance so the current will lag the voltage by 90 degrees. This current is known as the magnetization current. Remember that any time a current flows, it will produce a magnetic flux proportional to it which means it too is sinusoidal and in phase with the current...and since we are dealing with an ideal transformer all of that flux flows in the iron and the links both coils. Considering the primary coil we will measure a voltage drop V1 across its terminals and it will be equal to the applied input voltage Vac because of the direct connection in coil 1 the flux produced by the generator is related to the voltage V1 by Faraday’s law which involves the changing flux times the number of turns in the primary coil…in coil 2, the secondary coil, the voltage produced by that same flux (mutual inductance ) is also given by Faraday’s law…. which involves the same changing flux times the number of turns in the secondary coil…That voltage is either either larger or smaller than V1 depending on N1 & N2 but is in phase with the applied voltage Vac.

Mathematically we can re-write the two Faraday’s law equations for both the primary and secondary coils keeping only the associated voltages and coil turns number on the right hand side of the equations. As you can see both right hand sides are equal to the same changing flux -d(phi)/dt...there for we can write -d(phi)/dt is equal to V1/N1 is equal to V2/N2 which means V1/N1 is equal to V2/N2 and V1/V2 is equal to N1/N2. These two ratios  V1/V2 and N1/N2 are known as the "Turns Ration" of the transformer and sometimes designated with the letter "a".

Anker’s has just released a peek at their most advanced multi device fast charging line-up. In order to check out this advanced lineup…Simply go to this web address…https://bit.ly/3YFQpmO

This video is part of my “Electrical Technical Information” series! Be sure and stay tuned, as I will also, from time to time, be reviewing electrical products, that in my opinion are worthy of paying attention to. This address…https://bit.ly/3VJle8z will give you access to the supplier of aforementioned products and it is also the connection to obtain a free, copy of my 50 page “Electrical Power” crib sheets.

My free “electrical crib sheets”…https://bit.ly/3VJle8z

See the full range of ANKER products…https://bit.ly/3YFQpmO

Directly access my Stan Store courses…https://stan.store/GVB

Blog #22 - More on Sinusoidal Current and Voltage

The r.m.s. value of an a.c. supply is equal to the direct current which would dissipate energy at the same rate in a given resistor.

We can use the same logic to define the rms value of the voltage of an alternating voltage supply:

Vrms = the peak voltage divided by the square root of 2 where V is the maximum (or peak) value of the voltage.

The RMS value of an a.c. supply is equal to the direct current which would dissipate energy at the same rate in a given resistor

We can use the same logic to define the RMS value of the voltage of an alternating voltage supply.

Where V is the maximum (or peak) value of the voltage and I is the maximum (or peak) value of the current. So we have a way of calculating the RMS values of both current and voltage from their respective peak values.

For sinusoidal current & voltage…

Pavg = Irms x Vrms

Vrms = Irms x R So we can now express a current and a voltage in terms of a single value (RMS)…and for circuits with resistive loads only all of the rules for mesh analysis and theorems can be used…

Series load analysis

Parallel load analysis

Mesh load analysis

Kirchhoff's Voltage & Current

Linearity Property

Homogeneity property

Additive property

Superposition Theorem

Thevenin’s Theorem

Norton's Theorem

Source Transformation

This blog is part of my “Electrical Technical Information” series! In this series, I will be covering essential topics to help you understand electrical system. Be sure and stay tuned, as I will also, from time to time, be reviewing electrical products, that in my opinion are worthy of paying attention to. This address…https://bit.ly/3UGjBIg will give you access to the supplier of aforementioned products.

It is also the connection to obtain a free, copy of my 24 page “Three Phase Transformer Workbook” which will serve as a quick reference and reminder of technical calculations you may need.

One of those amazing and versatile products is the EcoFlow Delta Pro Ultra.

Which can be modified to suit any homeowners needs, operating virtually silent and when paired with the Ecoflo smart home panel 2 is extremely versatile.

The Eco flow home panel 2 ties any and all of your standby power equipment together and will control them efficiently. It will even control your connection to the utility grid to make sure you're only using the least expensive power, switching to your standby power during those expensive time of use rates.

Before I end this blog, I want to repeat the connection to obtain a free, copy of my 24 page “Three Phase Transformer Workbook” which will serve as a quick reference when working on my courses and quizzes. It is also handy reference and reminder of technical calculations require in your daily job requirements. Also, here is the link to all of my electrical courses, which are located in my Stan store.

Blog #21 - Sinusoidal Waves & RMS Values

This video is part of my series on alternating current. In this video, we are going to define RMS values. You will find this topic along with others in my course entitled Basic Fundamentals of AC Circuit Analysis. You can access this and my other courses on my stand store at this web address.

As we communicate the value of voltage and current with others in the industry of electrical power, we have to ask ourselves how useful are using any of the terms and is there some way of measuring the values that is the most useful way. That question was asked and answered a long time ago and the answer was the RMS values.

Before just jumping to the definition of RMS, which by the way is mathematically related proportionally to amplitude peak, peak to peak, average and mean average values, let's go through some logical steps to get there. Starting with two simple circuits, one DC, one AC. That is, each with the same load but one driven by DC source and the other driven by an AC source.

When we close the switch on the DC circuit, the bulb will light with an intensity that is dependent on the resistance, RL, of the light and the DC current.

Now let's close the switch and adjust the AC current to the light bulb with the same Intensity. That is to say both loads, both lights consume the same average power. So we now ask ourselves what is that AC current?

We can come to the conclusion that if the two bulbs light to the same brightness, that is they draw the same amount of power and it is reasonable to consider the current IAC to be in some ways equivalent to the current IDC. So what is that value of AC?

It would be useful if there was some meaningful way to calculate it. So let's go there. If an AC supply is connected to a component of resistance, say R, the instantaneous power dissipated is given by the power equation I squared R. If we plot I2, the instantaneous current, which itself is a sine wave, it is always positive because plus I times plus I is positive and negative I times negative I is positive. It does go to zero but never negative.

Remember that the instantaneous power dissipated is given by the equation power equals I2R. The peak or maximum value of I2 is shown here and labeled I2 max. The mean or average value of I2 is I2 max divided by two.

So the average value of power is, I will call it PAV is equal to I2max over 2RL. We just saw from the previous slide that the average power consumed in the circuit is given by this equation which is equal to the maximum value of the current squared over two times the resistor.

Let's define a current that when used to calculate power gives us the average power. In other words, when that current, let's call it Idefined for now, is squared and multiplied by RL gives us the average power.

But the defined or I2defined is also equal to I2max over two. Therefore, the square root of the mean current equals that defined current.

So we just discovered that what the value of Idefined is equal to I max divided by root two…and we call this current IRMS…or root mean square and it is 0.707 the value of the maximum current.

This is another more useful way to describe AC quantities, voltage and current. And of course it can be converted directly to amplitude peak or peak to peak or average just by multiplying by a scaling factor. However, we use RMS values for current and voltage.

We can directly calculate the average power from these root mean square quantities.

This video is part of my electrical technical information series. In this series, I will be covering essential topics to help you understand electrical systems.Be sure and stay tuned as I will also, from time to time, be reviewing electrical products that in my opinion are worthy of paying attention to.

This address https://bit.ly/3UGjBIg will give you access to the supplier of the aforementioned type products. It is also a connection to obtain a free copy of my 24 page three phase transformer workbook which will serve as a quick reference and reminder of technical calculations that you may need. This address of course is case sensitive.

One of those amazing and versatile products is the EcoFlow Delta Pro Ultra which can be modified to suit any homeowners needs operating virtually silent and when paired with the EcoFlow smart home panel 2 is extremely versatile. The EcoFlow home panel 2 ties any and all of your standby power equipment together and will control them efficiently. It will even control your connection to the utility grid to make sure you're only using the least expensive power switching to your standby power during those expensive time of use rates.

In order to view the full range of EcoFlow products and obtain a free copy of my three phase transformer workbook check into this web address https://bit.ly/3UGjBIg and simply provide your email address which will guide you to the browse the full extent of their products. There is no cost or commitment for viewing and by providing your email address it will allow me to keep you posted on future videos courses and EcoFlow products.